Special Features
Expression Pedal Settings Blocks
On the Globals Tab, you can specify up to 128 Expression Pedal Settings Blocks. Each block is a separate expression pedal configuration that can be recalled at any time.
To edit a settings block, simply double click it in the Expression Pedal section of the Globals Tab. The Expression Pedal Edit Page will pop up, allowing you to configure that block. Each one can be named to help identify it.
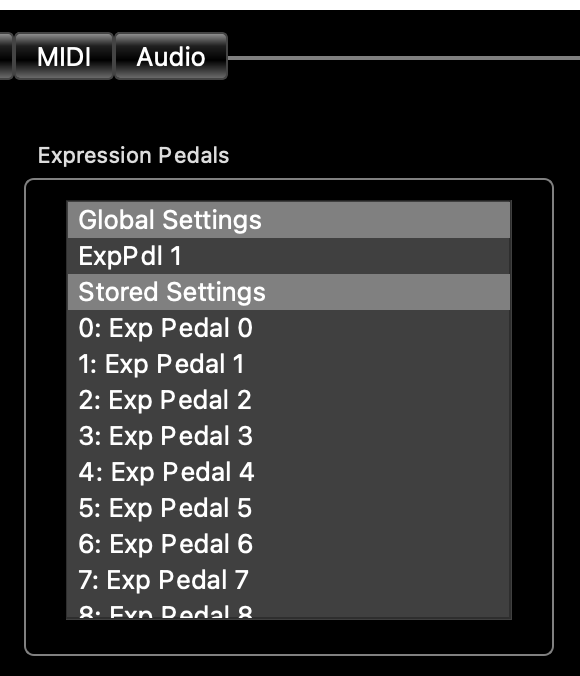
To use a settings block, execute a System / ExpPedal action. This is typically done by assigning that action to an IA button, but it can also be executed in other ways such as Preset Actions or an expression pedal position switch.
This action below, when placed on a button, will set expression pedal #1 to the settings in Exp Pedal 5 when the button is turned on. When the button is turned off, the expression pedal will return to its global settings.

External MIDI Control
Incoming PC and Bank Messages
The Mastermind can be controlled by an external MIDI device such as a computer, sequencer or other type of MIDI controller. To enable this feature, set the MIDI Receive Channel parameter to the desired MIDI channel. This setting is found in the Globals Tab on the GT or in the MIDI Tab on the LT or PBC. Any bank or Program Change messages received through the MIDI In or USB B (To PC) ports on this channel will cause a preset change on the Mastermind.
The bank and program numbers are interpreted differently based on some settings:
Setlist=None
In normal bank and preset mode (no setlist active), the bank MSB (CC#32), LSB (CC#0) and program numbers are combined to create the desired preset number. The formula is:
(Bank MSB x 16384) + (Bank LSB x 128) + PC number = preset number
There are only 768 presets within the Mastermind, so only bank numbers 0 through 5 are valid. The Bank MSB should always be set to 0 (or not sent at all), and Bank LSB should be 0 through 5.
Examples:
To select preset 200, you would send:
CC#32, value 1
PC#72
Because 128 x 1 + 72 equals 200
To return to preset 4, send
CC#32, value 0
PC#4
Because 128 x 0 + 4 is 4.
The Mastermind always remembers the last bank numbers you send it, so if you use more than one bank of presets, you should always send a bank select CC before sending a PC to the Mastermind. Otherwise, you may end up with unexpected results where the incorrect preset is selected.
Setlist active, MIDI Bank Selects Song turned on
If you are using a setlist, and the MIDI Bank Selects Song parameter (found in the Globals Tab on the GT or in the MIDI Tab on the LT or PBC) is turned on, the Bank MSB and Bank LSB are combined to select a song out of the current setlist. The number is calculated as follows:
(Bank MSB x 128) + Bank LSB = song number
The setting Use Song Index determines how the song number is interpreted:
If Use Song Index is turned on: the song number indicates the song's position in the current setlist (0 = first song in the current setlist, 1 = second song in the setlist, etc.)
If Use Song Index is not turned on: the song number indicates the actual song number to load (0 = load song #0, 1 = load song #2)
The PC number selects which preset within the song is selected (0 = first preset in song, 1 = second preset in song, etc.)
Please note: If you try to select a song that's not in the current setlist, or a preset that isn't in the selected song, the Mastermind will ignore the request and remain on the current song and preset.
Examples (Use Song Index is turned on):
To select the first preset in the third song:
CC#32, value 2
PC#0
To select the fourth preset in song number 170:
CC#0, value 1
CC#32, value 41
PC#3
Examples (Use Song Index is turned off):
To select the first preset in song #12:
CC#32, value 12
PC#0
To select the third preset in song number 260:
CC#0, value 2
CC#32, value 4
PC#2
Setlist active, MIDI Bank Selects Song turned off
If you are using a setlist, and the MIDI Bank Selects Song parameter is turned off, the bank MSB, LSB and program numbers are combined to create the desired preset number. The formula used is the same as in the Setlist=None section above.
Upon receiving bank and program change messages, the Mastermind will find the first song that contains the resulting preset and will load that song and preset.
Other settings
In MIDI settings, there is also a Swap Bank MSB/LSB setting that reverses how the Mastermind handles bank CCs. With this checked, CC#0 is now Bank LSB and CC#32 is now Bank MSB. Typically, this setting should be turned off, but may be turned on for compatibility with certain devices.
CC Link: Controlling buttons using incoming CC messages
It’s also possible to control IA buttons using CC messages sent from a computer or other MIDI controller. Each IA button has a parameter CC Link that enables this feature. When you turn CC Link on, incoming CCs are compared against the first action in each button’s action list. If the incoming CC matches the channel and CC number assigned to the first action in the action list, the button will update based on the CC’s value (0-63 = off, 64-127 = on).
For example, if the first action on a button is Device 1 / CC Toggle #14, and MIDI device 1 is set to channel 4, then incoming CCs on MIDI channel 4 with CC number 14 will control the button.
Please note that each device has an Ignore Incoming CCs setting, which when set, will disable the CC Link feature for that device.
Remote Control
The Remote Control setting works with CC Link. When Remote Control is checked, the button still sends its actions as normal, but the button's visible state doesn't change. Only incoming CCs can change the visible state of the button. This feature is used with DAW software like Ableton which allows bidirectional synchronization of Mastermind buttons and Ableton controls.
Individual Loop and Switch Control using CC Messages
On the Mastermind LT and PBC, you can also assign CC messages to control individual loops, function switches, outputs and buffers. The MIDI Rx Ch parameter is used to choose the MIDI channel these CCs are received on. The default CC numbers are as follows: 
| Function | CC Number | Values |
|---|---|---|
| Loop 1 off/on | 48 | 0-63 off, 64-127 on |
| Loop 2 off/on | 49 | 0-63 off, 64-127 on |
| Loop 3 off/on | 50 | 0-63 off, 64-127 on |
| Loop 4 off/on | 51 | 0-63 off, 64-127 on |
| Loop 5 off/on | 52 | 0-63 off, 64-127 on |
| Loop 6 off/on | 53 | 0-63 off, 64-127 on |
| Loop 7 off/on | 54 | 0-63 off, 64-127 on |
| Loop 8 off/on | 55 | 0-63 off, 64-127 on |
| Loop 9 off/on | 56 | 0-63 off, 64-127 on |
| Loop 10 off/on | 57 | 0-63 off, 64-127 on |
| Loop 7 series/parallel | 58 | 0-63 series, 64-127 parallel |
| Loop 8 series/parallel | 59 | 0-63 series, 64-127 parallel |
| Loop 9 series/parallel | 60 | 0-63 series, 64-127 parallel |
| Loop 10 series/parallel | 61 | 0-63 series, 64-127 parallel |
| Buffer 1 disable/enable | 62 | 0-63 off, 64-127 on |
| Buffer 2 disable/enable | 63 | 0-63 off, 64-127 on |
| Buffer 3 disable/enable | 64 | 0-63 off, 64-127 on |
| Function Switch 1 off/on | 65 | 0-63 off, 64-127 on |
| Function Switch 2 off/on | 66 | 0-63 off, 64-127 on |
| Function Switch 3 off/on | 67 | 0-63 off, 64-127 on |
| Function Switch 4 off/on | 68 | 0-63 off, 64-127 on |
| Output A/Left off/on | 69 | 0-63 off, 64-127 on |
| Output B/Right off/on | 70 | 0-63 off, 64-127 on |
| Output B Invert | 71 | 0-63 normal, 64-127 invert |
| Mute | 72 | 0-63 muted, 64-127 not muted |
| Dry Send to Mixer | 73 | 0-63 muted, 64-127 not muted |
| Tuner | 74 | 0-63 off, 64-127 on |
| Page | 75 | 0-15 (page number minus 1) |
These CC numbers can be changed using the settings in the MIDI Tab.
Mastermind GT Special CCs
There are a few special CC numbers that affect the Mastermind GT as well. These only function if MIDI Receive Channel is set to something other than None, and the CC is received on the channel indicated by MIDI Receive Channel.
| Function | CC Number | Values |
| Bank Down | 117 | any |
| Bank Up | 118 | any |
| Select Page Number |
119 | 0 = page 1, 1 = page 2, etc. |
IA Link
IA Linking is a feature that allows you to link two or more buttons together so that turning one on turns the other on, and turning one off turns the other off. This is especially useful if you have more than one button that controls the same function. For example, you may have a button that controls a particular pedal on more than one button page. If you turn the pedal on on the first page, you want the button on the second page also to turn on so that it accurately reflects the state of the pedal.
Enabling IA Link
To enable this feature for a button, turn on the IA Link checkbox, which is found on the Button Edit Page. Once this is enabled, any button that has the same first action in its action list as the current button does will be linked. Pressing one button will affect the state of the other. The linked button will not send its messages or execute its Actions, however.
Other IA Link Features
Turning IA Link on also does a couple of other things:
Preset Button Index
When a new bank is selected, the Mastermind has to decide which preset is assigned to each preset button. It examines the buttons in a specific order, and assigns the first preset in the bank to the first preset button it finds. The second preset button it finds gets the second preset in the bank, etc. The order in which it scans through the buttons depends on your device:
Mastermind GT - starts in the upper left corner, and goes from left to right. When it reaches the end of a row, it goes down one row and starts at the left side of the row, scanning to the right again.
Mastermind LT - starts in the lower left corner (the 1 button), then scans to the right. When it finishes that row, it goes up to the Bank Down button, and scans to the right again. Finally, the Function button is scanned.
Mastermind PBC/10 - starts in the lower left corner (the 1 button), then scans to the right. When it finishes that row, it goes up to the Switches button, and scans to the right again. Finally, the Loops button is scanned.
Mastermind PBC/6X - starts in the lower left corner (the 1 button), then scans to the right. When it finishes that row, it goes up to the Functions button, and scans to the right again.
Order Reassignment with Preset Index
If for some reason, you want to change the order of how presets are assigned to buttons, you can do this with the Preset Index setting found on Preset buttons. By default, these are all set to 0, which means that the standard order (as described above) is used. If you assign different Preset Index numbers to the buttons, the presets will be assigned in that order - number 1 will receive the first preset in the bank, number 2 will receive the second preset in the bank, etc.
If you need to assign a button that accesses a specific preset regardless of which bank you're in, you can use an IA button with a System / Preset action.
For more information on Preset buttons and the Preset Index setting, please see Mastering the Mastermind Episode 6, Button Editing part 1, and Episode 7, Advanced Button Editing
Set IA
Set IA is an action that allows you to automatically turn one or more IA buttons on or off. This makes it possible to create complex interactions between buttons. For example, you could program a button that turns on a fuzz pedal to turn off all buttons that control overdrives. Or, turn on a delay whenever you activate any overdrive (but not have the delay button affect the overdrives).
Set IA works on any button that has Type set to IA. IA buttons have an IA ID parameter - this is how you identify and refer to buttons. IA IDs can range from 0 to 255. Setting the ID to 0 means that the button will never be affected by Set IA actions. Any other value allows it to be controlled by Set IA.
Once you have IA IDs assigned, you can use a System / Set IA action to control those buttons. Here's an example:
System / Set IA #4 off:ON on:OFF
Putting this action on an IA button will make it control any IA buttons that have IA ID #4. When this button is turned on, it will turn off all buttons with IA ID #4. When this button is turned off, it will turn on all buttons with IA ID #4.
The Mastermind will only allow a button to be switched once during a Set IA action, and it won't allow a button to control itself. This prevents the Mastermind from being stuck in an infinite loop.