Globals Tab
The Globals tab is the first thing you see upon starting the editor. It contains system-wide parameters that aren't specific to any song, preset or setlist.
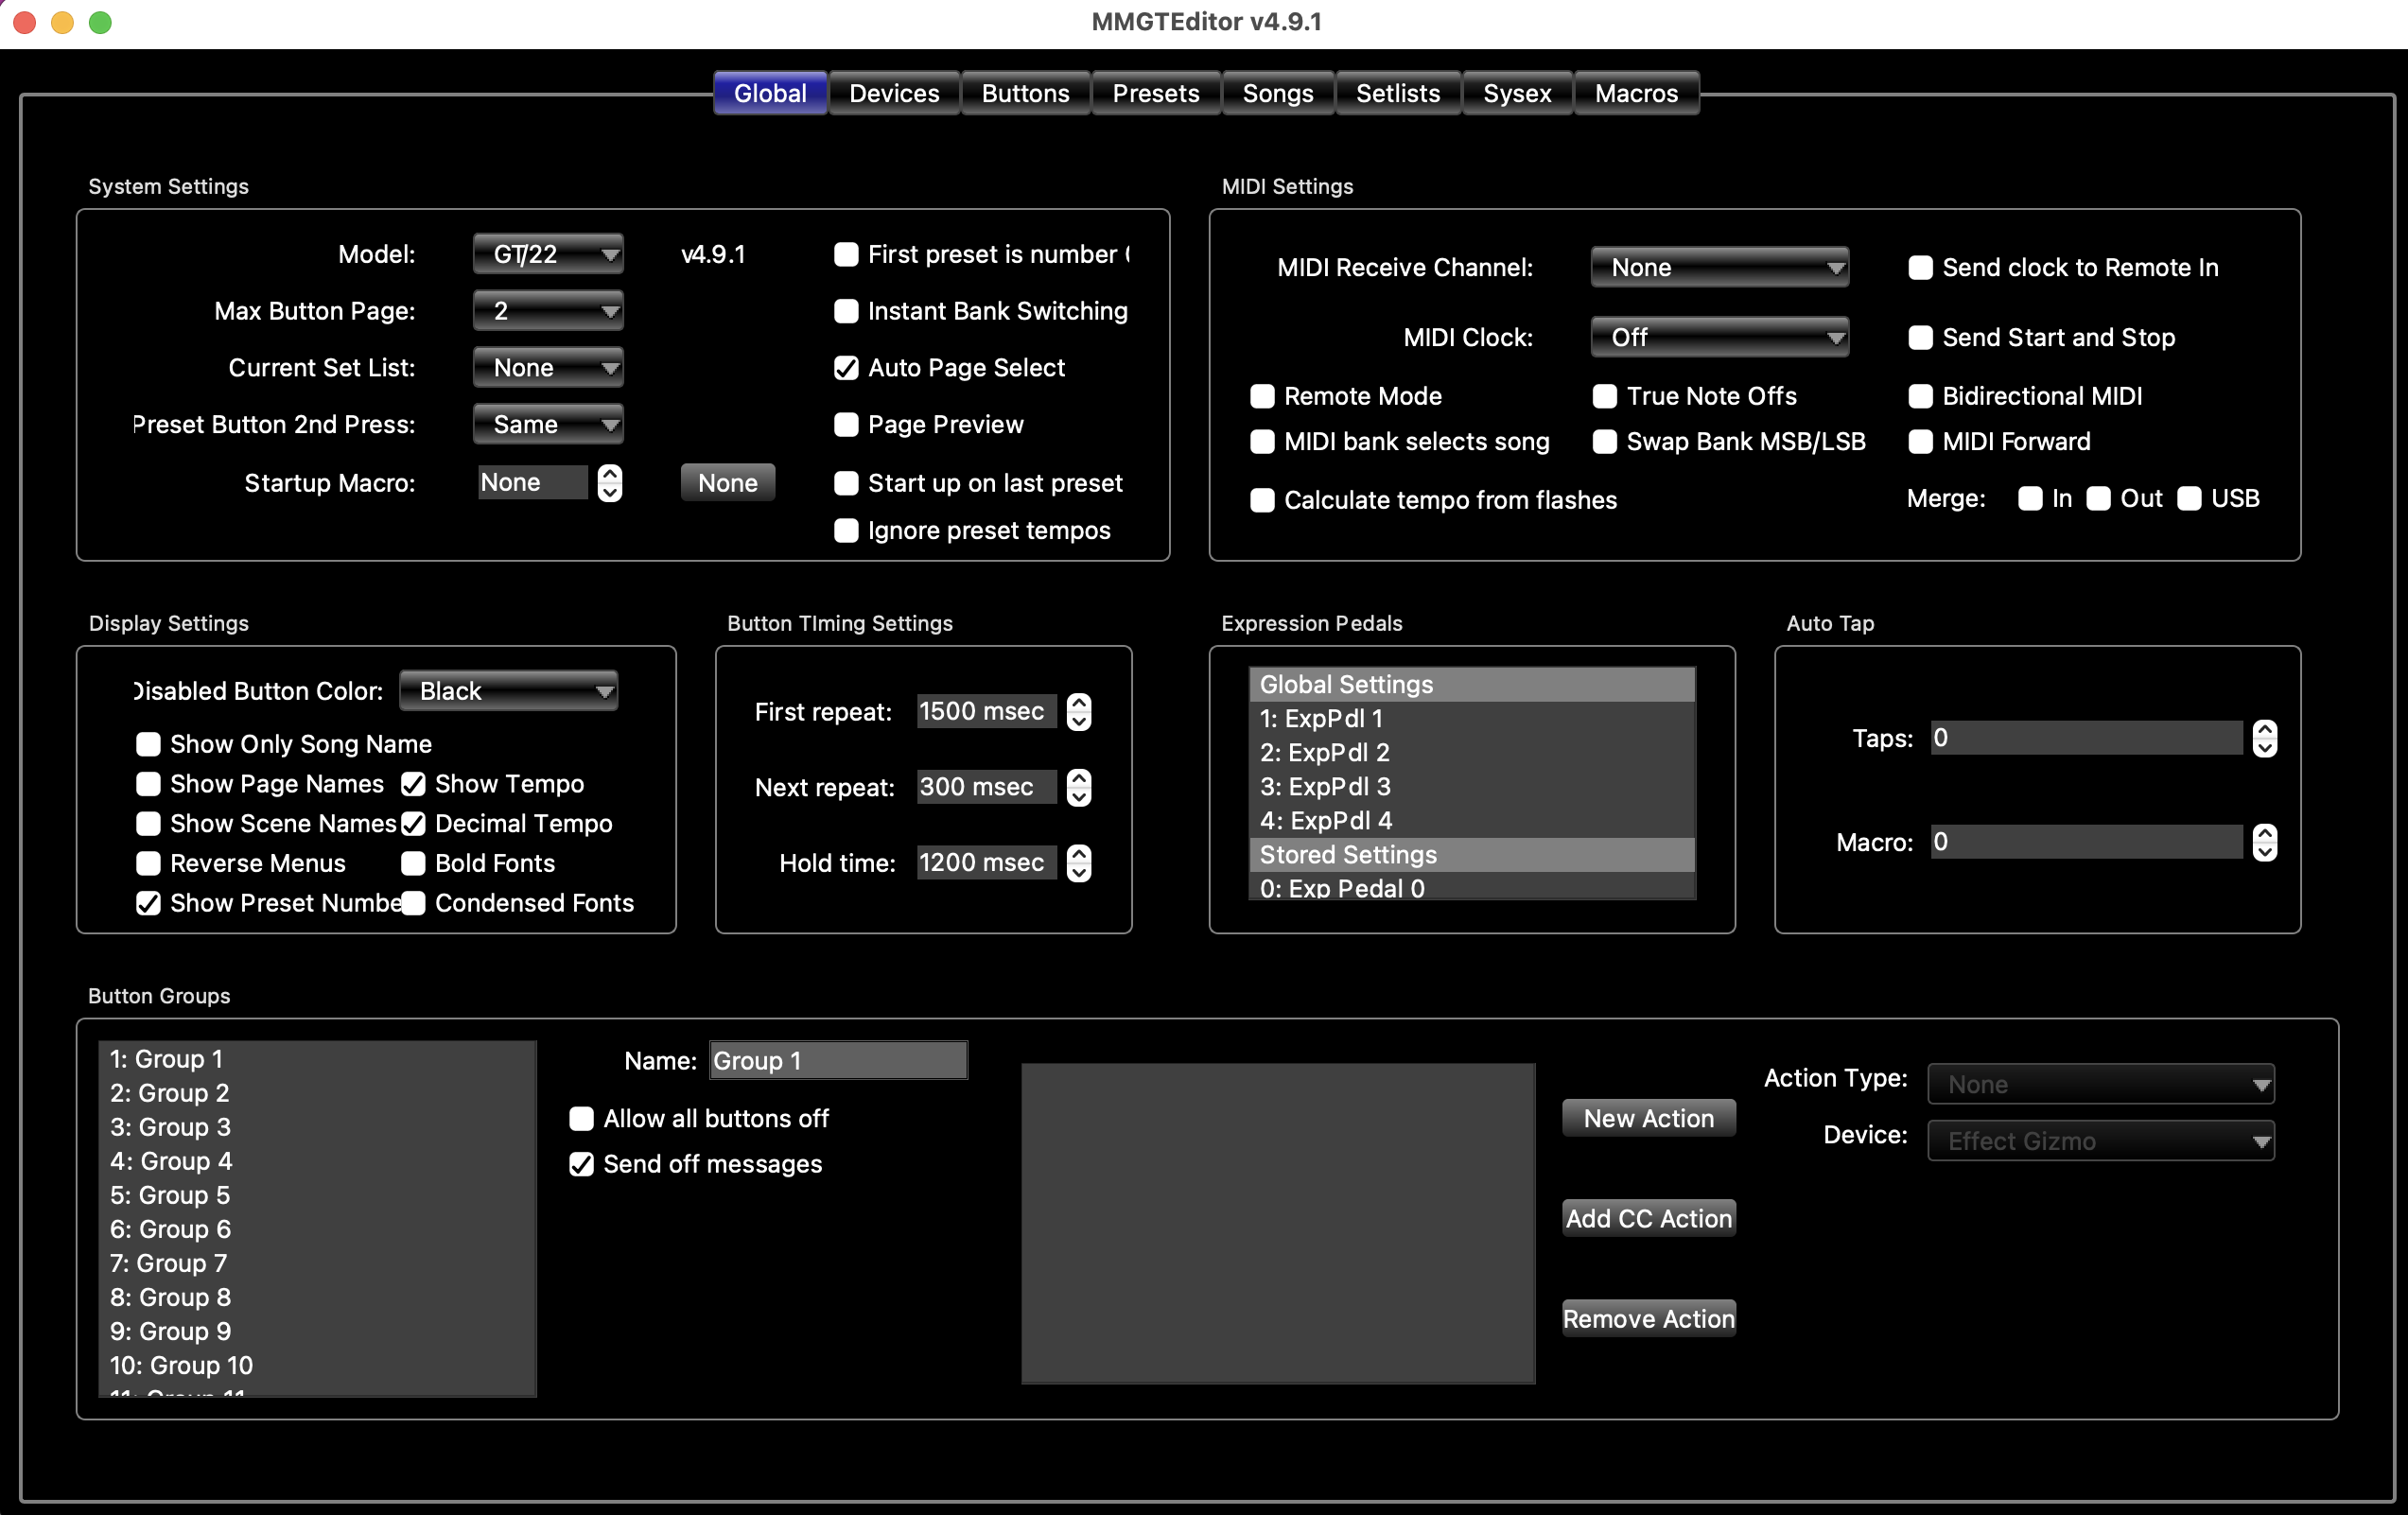
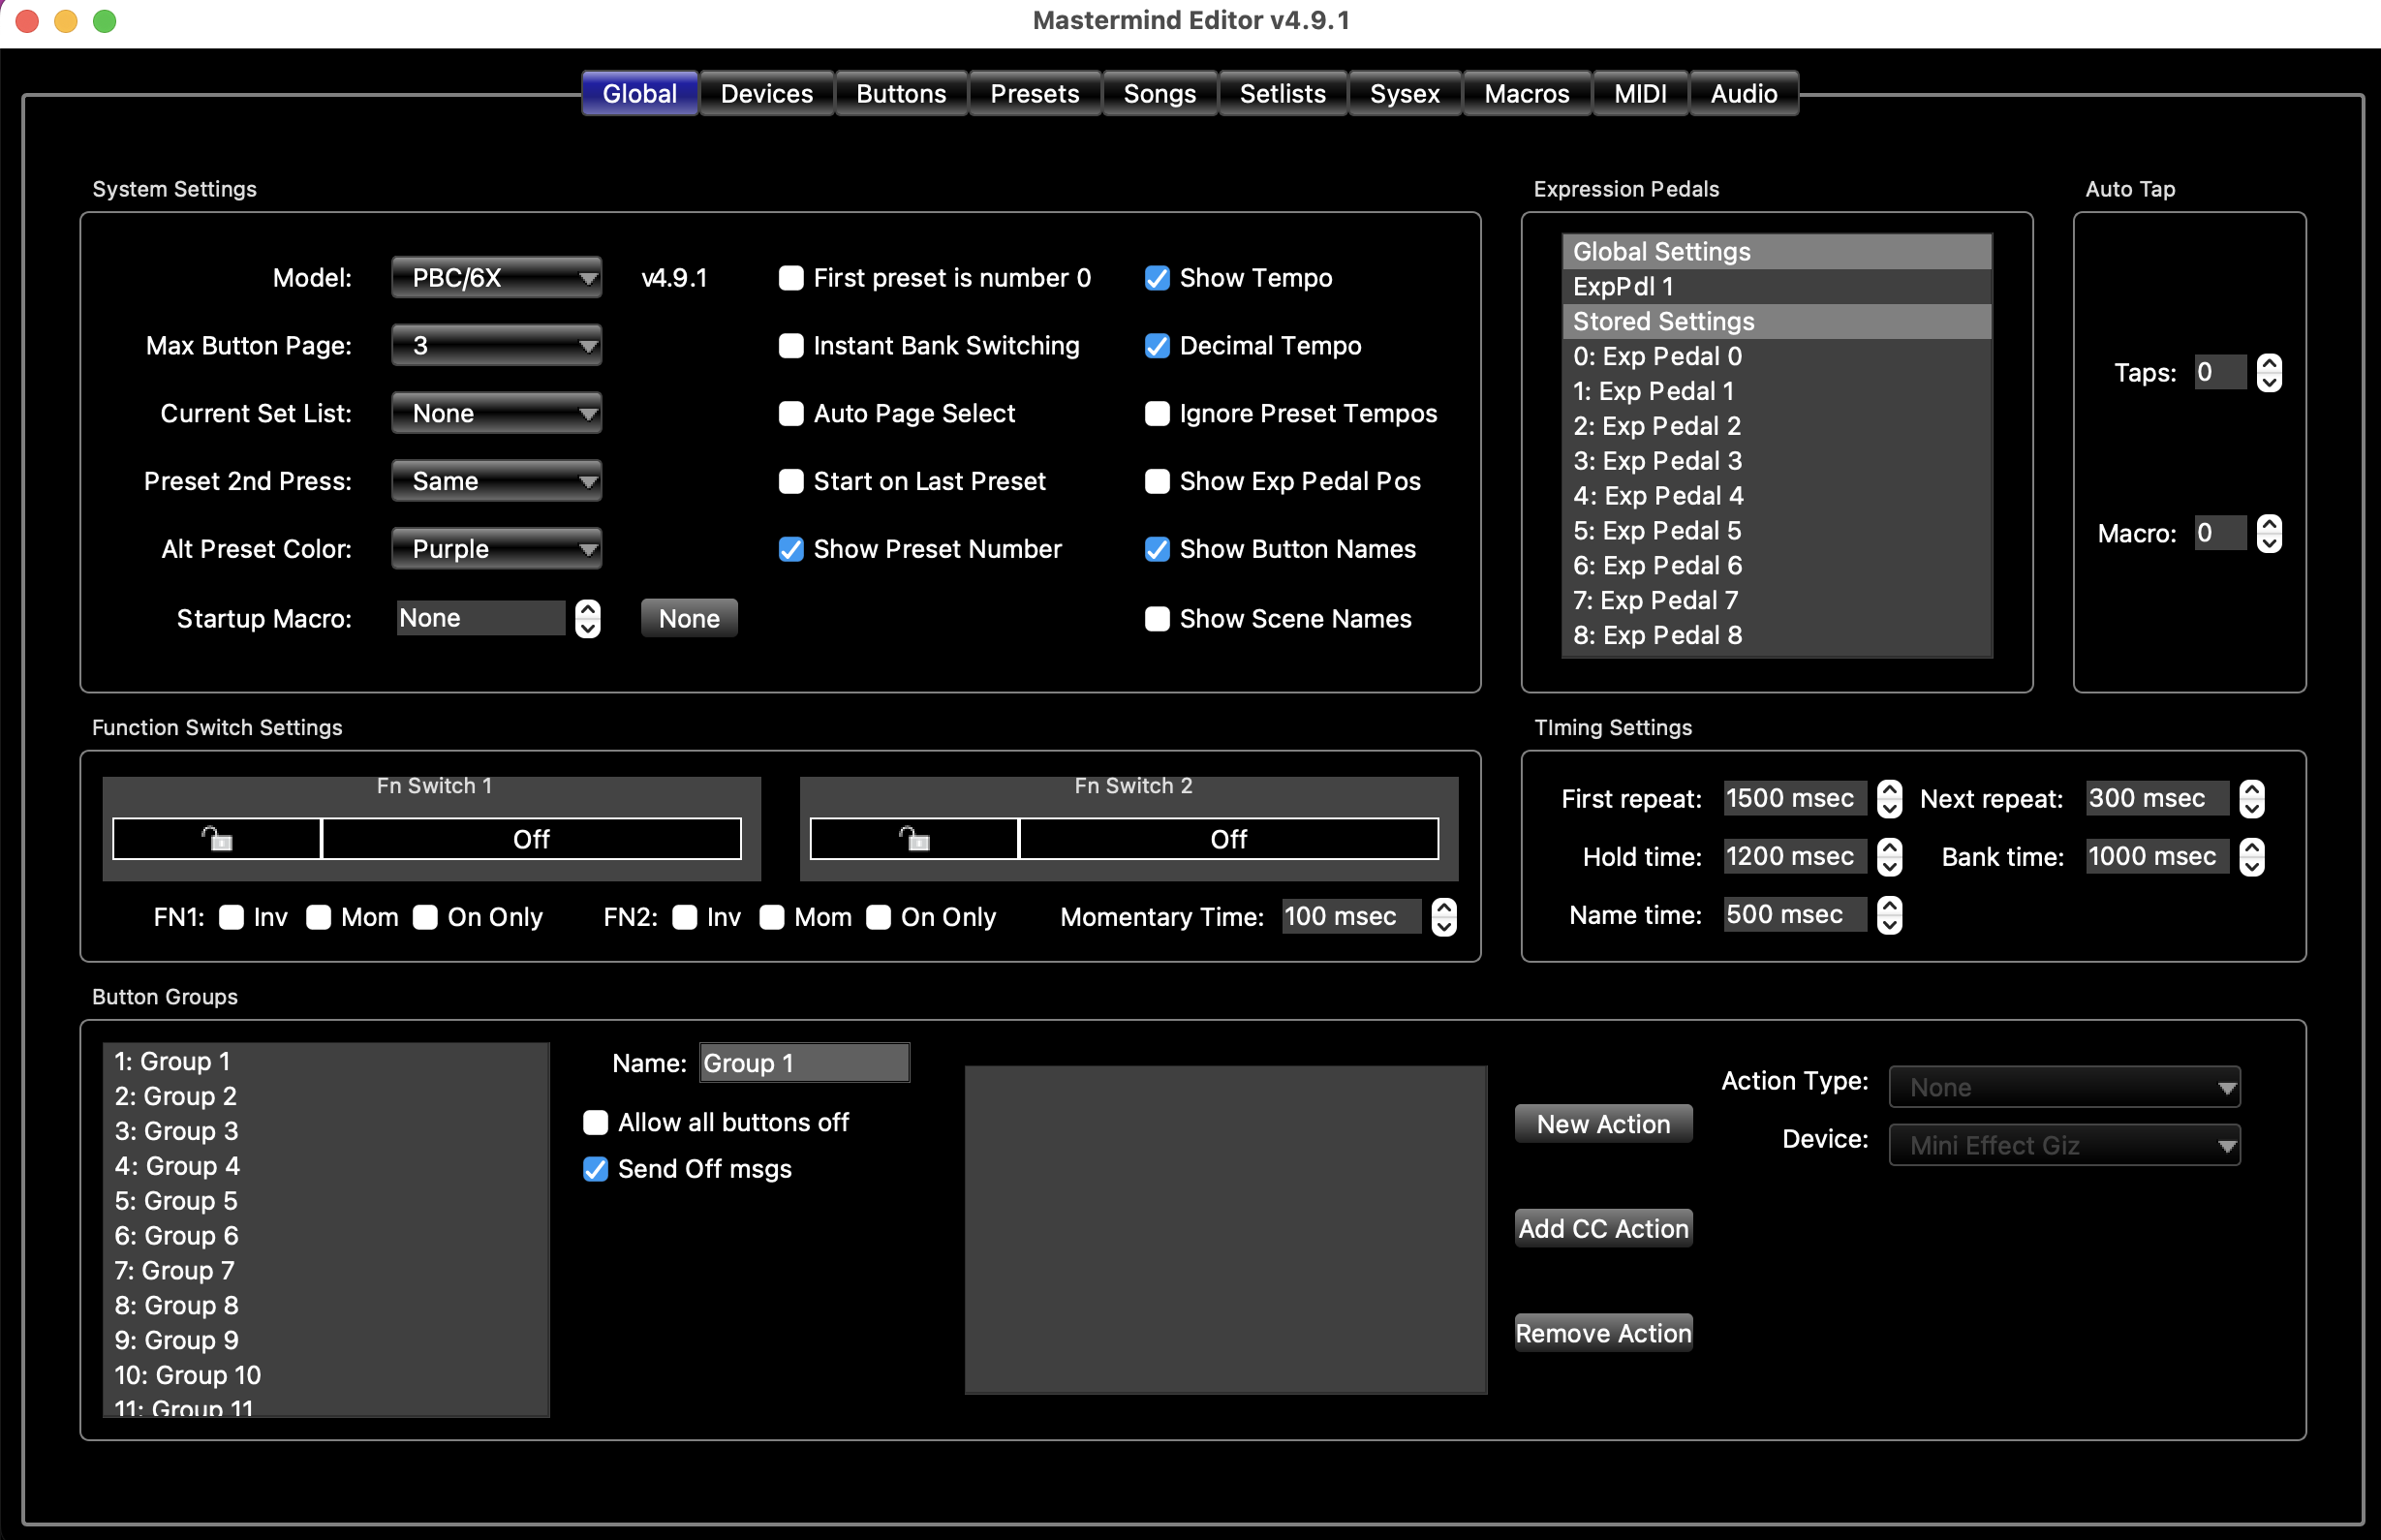
System Settings
Model - Chooses which model of Mastermind you are working with. You will be asked whether you wish to revert to factory settings for the model. In most cases, it's best to answer Yes to start with new settings.
Current Set List - selects which setlist is currently active. Possible values are:
- None - no setlist is active, the normal preset and bank mode is active.
- All Songs - setlist mode is active, and the setlist is made up of all all available songs, in numerical order.
- 1...64 - setlist mode is active, and the selected setlist is loaded.
- Same - does nothing special - just selects the same preset again
- Previous - selects the previously selected preset
- Global - selects the Global Preset
- Reload - reloads the current preset, resetting all IA buttons and PC messages to the state that is stored in the preset
- IA - runs the IA actions that are specified on this button
- Alternate - recalls this preset's Alternate Preset
Startup Macro - Specifies a Macro that will be executed on startup. This macro can send MIDI messages, change audio features on the Mastermind PBC, etc.
First preset is number 0 - when checked, the first preset in the system is numbered preset 0. When not checked, the first preset is numbered preset 1. This setting is primarily used to have the Mastermind's preset numbering match an external effect device's numbering scheme.
Instant Bank Switching - in the normal (not checked) setting, when Bank Up or Bank Down are pressed, the preset buttons flash, waiting for the user to select a preset. No preset is loaded until a preset button is pressed. When this setting is checked, pressing Bank Up or Bank Down result in an immediate preset change. The preset selected in the new bank is in the same position as was selected in the previous bank. For example, if the third preset button was selected, and Bank Up was pressed, the third preset in the new bank will be selected.
Auto Page Select - when checked, each preset change will also trigger a button page change. Each preset can have a page number specified with the preset's settings, and this is how the button page is selected. Turning this setting off will prevent the button page from changing automatically when the preset changes.
Page Preview (GT Only) - when checked, pressing Bank Up or Bank Down will switch button pages to the page specified in the first preset of the bank. This allows you to see not only the presets in the new bank, but also the button layout for the first preset in the bank, before actually selecting a preset. This setting only has an effect if Instant Bank Switching is turned off and Auto Page Select is turned on.
Show Page Names (GT Only) - When checked, the upper half of the main display shows the current button page's name, if any is defined.
Start on last preset - when checked, the last selected preset is loaded when the device powers up. When not checked, the device always powers up on preset 1 (or preset 0 if First preset is number 0 is turned on).
Show Tempo - When checked, the current tempo will briefly be displayed in the main LCD display when the tempo changes.
Ignore Preset Tempos - When checked, tempos specified in each preset are ignored. Only tempos specified in songs and ones tapped in manually will have any effect.
Show Exp Pedal Pos (PBC/LT Only) - When checked, the current expression pedal position will be displayed as a bar graph on the right side of the main LCD display.
MIDI Settings
This section applies only to the Mastermind GT. On the Mastermind PBC and Mastermind LT, the MIDI settings are located on a separate MIDI Tab.
MIDI Receive Channel - selects which MIDI channel the Mastermind responds to. Incoming Program Changes and Bank messages on this channel will cause the Mastermind to switch to the indicated preset. This setting also enables incoming CC (Continuous Controller) messages, which are set in the right side of this tab. Can also be set to None which makes it ignore all incoming Program Changes and Continuous Controller messages.
This setting is typically used when controlling the Mastermind from a computer or other MIDI controller.
You should not set MIDI Receive Channel to be the same channel as one of your other MIDI devices. This includes devices with bidirectional MIDI communication such as the Axe-Fx and Kemper Profiler. When using these devices, you don't need MIDI Receive Channel to be set to anything other than None.
MIDI Clock - selects how the Mastermind PBC handles MIDI clock messages. Possible values are:
- None - does not transmit or receive MIDI clock
- Transmit - transmits a MIDI clock signal. The tempo can be set using tap tempo button, or can be programmed in any song or preset.
- Receive - receives a MIDI clock signal. It will also send the incoming clock signal out the MIDI output.
- Auto - If an incoming MIDI clock signal is detected at the Remote In or USB port, act as if Receive was selected. If no incoming MIDI signal is detected, act as if Transmit was selected.
Clock Pulse Limit - If set to 0 (the default), MIDI clock will be sent normally - as a continuous stream of MIDI messages. If set to a number higher than 0, the Mastermind will send that many MIDI clock messages every time the tempo changes, then stop sending. This is similar to tap tempo, but is faster.
Bidirectional MIDI - when turned on, makes the MIDI Out and Remote In ports bidirectional. Pins 1 and 3 are used for the second communication channel. This is used for Remote Mode or to communicate with bidirectional MIDI devices like the Axe-Fx.
Remote Mode - when enabled, allows you to link two or more Masterminds together and have them all operate in unison. This makes it possible to use one Mastermind as a remote controller for another. When using this mode, the MIDI Out of each device connects to the Remote In of the next MIDI device. The last device's MIDI Out is used to connect to the rest of your MIDI devices.
Bidirectional MIDI should be turned on when using Remote Mode, and all Masterminds need to have the same exact settings on them in order for Remote Mode to work correctly.
Expander - when checked, allows you to link two Masterminds together and use them as one unit. This is different from remote mode in that you can use the audio loops in each unit independently and you can have different button configurations on both units. Remote Mode needs to be turned on for this parameter to be visible. Bidirectional MIDI needs to be on when using expander mode.
MIDI bank selects song - This setting changes how the Mastermind responds to MIDI bank messages. Refer to the External MIDI Control section for more details.
Use Song Index - This setting, along with the above setting, controls how the Mastermind responds to MIDI bank messages. Refer to the External MIDI Control section for more details.
Merge (In / Out / USB) - when one or more of these checkboxes are checked, the Mastermind takes any MIDI messages received at that port and forwards them out the MIDI Out port.
MIDI Forward - when enabled, the Mastermind takes any MIDI messages received at the USB Device port and forwards them out the MIDI Out port. And, any MIDI messages coming in to the Remote In port are forwarded out the USB device port. This allows you to use the Mastermind as a MIDI interface for a computer.
Display Settings
This section applies only to the Mastermind GT
Show Only Song Name - when checked, displays only the song name on the main display (not the preset name).
Show Page Names - when checked, displays the current button page's name in the upper line of the main display. If the current page has no name, it is not displayed.
Bold Fonts - when checked, sets all fonts to bold.
Show Tempo - When checked, the current tempo will briefly be displayed in the main LCD display when the tempo changes.
Auto Tap
Auto Tap allows you to send tempo taps to devices that support them. When the Taps parameter is set to a number other than zero, it will send the specified number of taps every time the tempo changes.
Auto Tap uses a Macro to specify what it does. On the Mastermind PBC and LT, you can use a System / Fn Switch action to send taps through a function switch output - this will work with any pedal that has a tap switch input jack. You can also use a CC, PC, Note or Sysex action to send MIDI messages for each tap.
Some devices accept momentary taps, some accept latching. If your tempos are not coming out correctly, try changing the function switch's momentary setting. If you're sending a CC message, change the action from CC Toggle to CC Momentary or vice-versa.
Each preset can specify a different a different tap division, which allows you to change from standard quarter note taps to other note types. This is described in the Presets Tab section.
For more information about Auto Tap and Tap Tempo, please see Mastering the Mastermind episode 22, Tempo
Timing Settings
First repeat - sets the number of milliseconds needed to hold a button before the button starts repeating
Next repeat - sets the number of milliseconds between button repeats
Hold time - sets the number of milliseconds needed to hold a button before its Hold Function is activated
Bank time (PBC/LT Only) - when you press a Bank Up or Bank Down button, the Mastermind will enter bank selection mode. The main display will scroll through all of the presets in the currently selected bank, displaying the name of the presets in the bank one at a time. This parameter sets the number of milliseconds that each preset name is displayed.
Name time (PBC/LT Only) - If Show Button Names is turned on, this controls how many milliseconds each button name is displayed on the screen.
Function Switch Settings
This section applies only to the Mastermind PBC and LT
In this section, there's one block for each function switch. Each block has a lock icon and an on/off switch. The on/off switch next to the lock icon allows you to select the state of the function switch. This state will be used for the function switch unless it's overridden by a button press or a preset change.
The lock icon controls whether it's possible to override the global on/off setting. It has three states:
- Unlocked (open lock icon) - This function switch can be changed by IA button presses and preset changes. This is the default setting.
- Locked (closed lock icon) - This function switch is locked. It can't be changed by IA buttons or preset settings. The function switch will always stay in the specified state.
- Independent ("I" icon) - This function switch is independent. It will not change automatically when changing presets, but will allow you to change states by pressing an IA button.
FNx Inv (invert) - when checked, the selected function switch will be inverted - when the function switch is 'on', the relay is open, when the function switch is 'off', the relay is closed. This is also known as a 'normally closed' switch. When not checked, the switch is not inverted and 'normally open'.
FNx Mom (momentary) - when checked, the selected function switch will be momentary. That is, each time the function switches' state changes, the relay will turn on for a short period of time and then turn off. When not checked, the function switch will be latching - it will turn on or off and stay that way until the next time the function switches' state changes.
FNx On Only - this parameter is designed to be used in conjunction with the Momentary setting. When this setting is turned on, the function switch output will only pulse when the switch is turned on, not when the switch is turned off. This setting is used when controlling channel switching on certain amps, but should be left turned off in most cases.
Momentary Time - sets the number of milliseconds that momentary switches stay on before they automatically turn off.
For more information about Function Switches, see Mastering the Mastermind episode 17, Function Switches
Expression Pedals
This section contains buttons that bring up the Expression Pedal Edit Page to edit a pedal's global settings. These are the settings used for each expression pedal, unless the settings are overridden by the current preset or using an ExpPedal action. Expression pedal overrides are specified in the Presets Tab.
The section has settings for each button group. On the left, there's a list of groups. You can select a group there, and edit its parameters:
Name - Sets the group's name. This name is only used for reference
Send Off msgs - selecting a button contained in a group will result in messages being sent by the button that's been turned on. When this setting is checked, the button that was turned off as a result of the button press will also send its messages.
There is also an action list associated with each group. This action list is run when you switch from no buttons turned on to 1 button turned on, or vice-versa. This feature requires that Allow all buttons off is turned on. Example: you have three buttons grouped together, each of which selects a different preset on an effect device. You can set up a group action to bypass the pedal when all of the buttons in the group are turned off, and to enable the pedal as soon as one of the buttons in the group is turned on.
No comments to display
No comments to display